How I make hover images
Since I posted my new site, I've had a few people who were curious as to how I put it together, and attempts to just describe in a comment weren't super successful,, So, hopefully this page will do a better job of explaining my process. Might still be a little wordy, but hopefully the images help make things more clear! Also, apologies for any wonky jargon, I have absolutely zero training in any of this and I'm making it up as I go along.
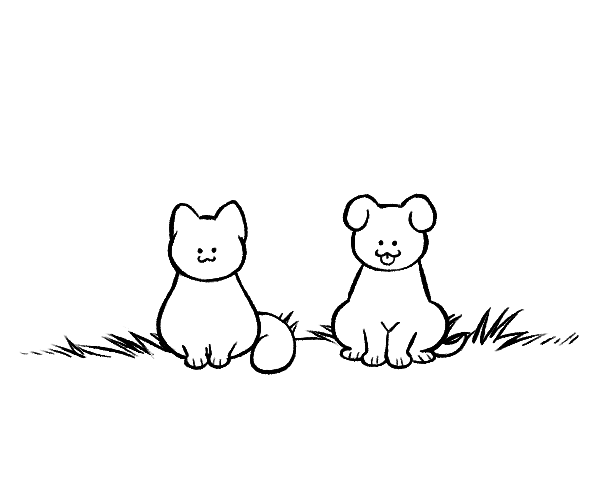
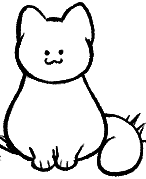
First, we start with our base image. I doodled something up for this,,
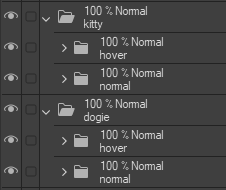
An important thing to note is the organisation within the art file I have here. You can use any art program to put this together, a free one I can recommend is Firealpaca (or its big sister, Medibang Paint), but I use Clip Studio personally. The image is made up of several layers, with the background at the bottom and the interactive elements on top. These are then organised within their own folders, as I need both a "normal" version of each and a "hover" version of each. Obviously you could make these in something like MSPaint that doesn't have layers, or traditionally, but I really do recommend having an art program with layers for editing.
So, in this image we have two big potential hover points, the cat and the dog, but obviously we wouldn't want one to react to our mouse hovering over the other. Now, let's start to make things move!
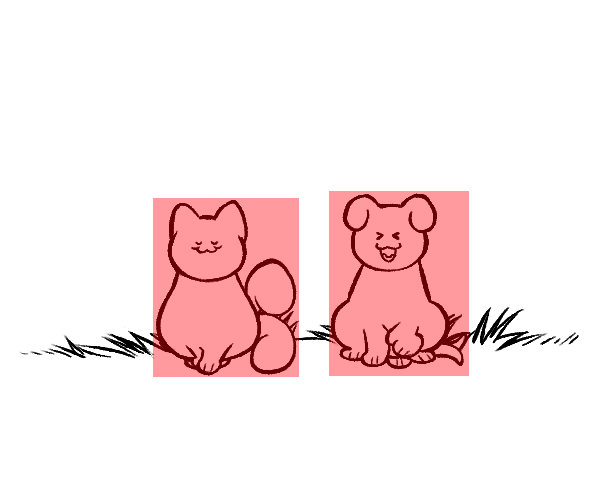
On a new layer over top everything else, with opacity set to 40% so that whatever's underneath is visible, I draw some squares. Use the shape tool for this so that everything's all straight and tidy, and make sure that both the "normal" and "hover" images are visible so that both are enclosed within the squares you draw. This is important, as if anything falls outside of it, you'll end up with a glitchy looking final product. Let's make some measurements.
 |
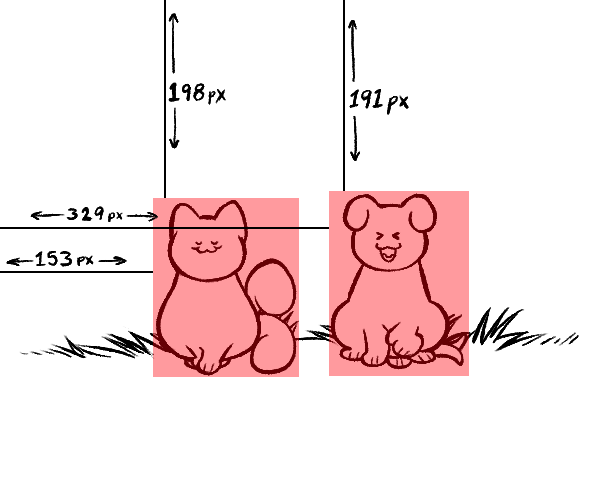 |
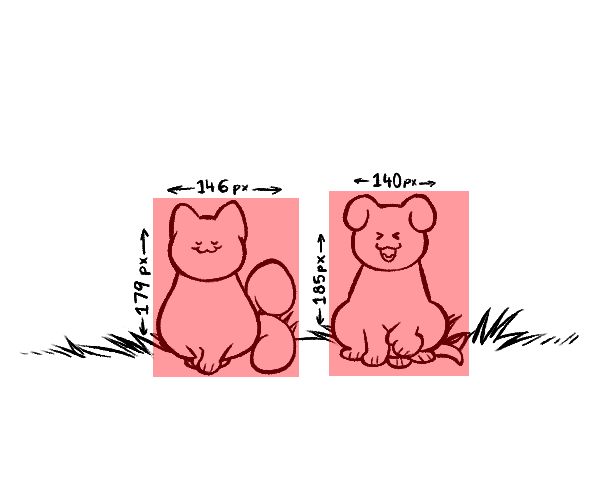
The important things to figure out are as follows: The width and height of the boxes you created, and the space between the top of the boxes and the top of the image, and the space between the left side of the boxes and the left side of the image. Also needed is the height and width of the full image.
 |
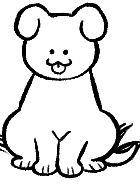 |
Then, using the size and placement of the boxes we drew, we crop flat versions of both the "normal" and the "hover" images for our cat and dog. Making sure that the size of these lines up with the measurements used in the CSS is very important... |
|
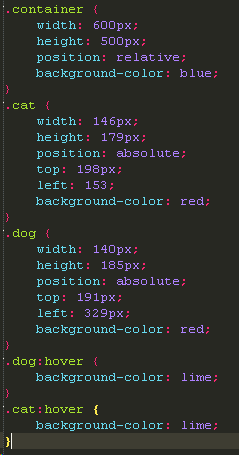
We will then take these measurements and create three divs. A container div, and a div for both the cat and the dog. The container div is the same height and width as your full image, while the cat and dog divs' sizes correspond to the measurements you took for each. We also set the position on the container div to relative, and any hover item divs to absolute, this allows the container div to move with the page, while any hover items are static within the div.
At this point you can also go ahead and give each div a background-color set to whatever, as it's only for debugging purposes.
That said, check the image to your right, do you notice something? That's right, here's the magic of :hover, an addition you can make to a css item that means that whatever inputs you put there, they are only active when the user mouses over the object. Set the background colour to something different here.
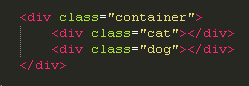
Now that the CSS is in a usable state, we have to insert our divs. This is a very simple process, make sure you wrap your hover divs in your container divs, and it should look something like this:
Nice! Everything looks to be in place. Now, to finish things off, we just have to replace those background-color elements with background-image instead.
The container's background image should be your full image, with the background and the normal versions of the hover items. This lessens how noticeable the image load in time is on slower connection. The background images for your hover items are of course the "normal" version on the default css item, and the "hover" version on the :hover item.

Some final things to note!
- This technique can be used for as many hover items as you'd like, really! And it's easy to add to after the fact.
- The only real limit is that divs overlapping will mess things up, so make sure that you check there's no overlaps...
- Animated hovers can easily be created by using GIFs for the background images.
And there you go! Scroll back up top to see the final product again. Hopefully this is of any use to you! I'm not a very technically minded person, so I've tried to make this as visual as possible, hope that helps through my wonky explanations. Do tell me if there's anything you'd like to ask or to add!